Posts

Photoshop Tutorials

Image
 For this assignment I am going to be reviewing three Photoshop tutorials that I watched. This tutorial was all about changing the color of anything in PhotoShop. It requires a hue saturation adjustment layer which allows for the easy color change. By using the 'master' drop down it will change all the colors in the image. If you want to change a specific color in the image use the eyedropper tool to select the color on the image then by sliding on the hue bar you are then able to change to the desired color for that part of the image. I think that this tool will be very useful when I am creating my projects. I think a big part of PhotoShop is altering images to make them different from how they started and changing colors is a big aspect of that.  This tutorial focused on cropping, resizing and adding more space. The crop tool can be found on the tool bar or accessed by hitting 'c' on the keyboard. At the top of the screen you can find the ratio button with drop down o...
Propaganda Poster

Image
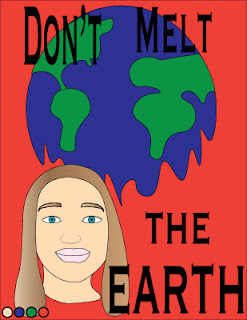
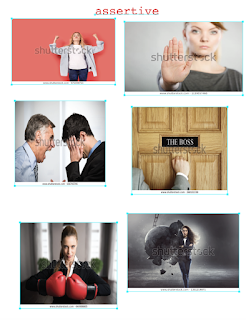
For this project I decided to create a propaganda poster for climate change. Below is my poster. For this project we had to include a self portrait aspect, here is the photo I used to base off my portrait. I began by collecting some inspiration photos, here they are. When the assignment was first assigned to us I immediately thought of climate change as something that I wanted to create my propaganda poster about. Climate change, the environment, and global warming are very important aspects to me. I believe that if we continue on with the way the world operates that there really will be nothing of livable conditions for us to survive on in the future. I have watched countless documentaries and environmental shows that show how the earth has changed, how it will change, and what can be done about this problem. It is something I am very passionate about. When creating my self portrait aspect of the project I wasn't really sure how to include it on my poster but to me it signifies ho...

Adventure Logo

Image
 To start off this project I chose five words that described myself and created moldboards for each word.        After creating the five moldboards I went on to create 5x5 rough draft logo sketches for each. After creating all the sketches I chose one logo and took to illustrator to create b&w and color versions. The color versions are my final completed versions of my logo.  When starting this project and choosing words to describe myself I feel as though with some of the words I could've chosen better words for the final part being needing to create a logo for it. The words I chose besides adventurous were very hard for me to figure out what to draw for the logo and I honestly did not like any of those drawings. From the start I knew I would end up chasing adventurous because I had this logo idea from the start. I enjoyed this assignment because it was very creative and I had freedom to create whatever I chose to. I really like working in Illustrator ...

Calligram Project

Image
  For my project I have created a beach island scene. The image includes waves, an island, a palm tree, and the sun! I thoroughly enjoyed doing this project, it made sense to me and I wasn't constantly struggling. I liked that for the words to create the calligram we had to write a letter to our future selves in twenty years. I think that this made the project more meaningful then just using random words and sentences to create the images. For me I chose to do a beach scene because I grew up boating and going to the beach all the time, so for me the ocean and beach actually hold meaning and a lot of memories. For me in the future it ties in because I want to be close with friends and family that I grew up with and met along the way in life. These people if in my life will spend time at the beach with me and create memories there so that is another reason I chose the beach. A tool that I used a lot to create my project was the pen tool. I started creating my image mostly using the p...

Illustrator Tutorials

Image
 I have taken the time to watch a couple illustrator tutorials on tools for beginners and here are my favorites! The first video I have watched is about learning the basics of working with the 'pen tool' and how one might use it. The pen tool is basically how you would  create all your shapes in Illustrator. I think this tool can be easily used. Once you play around with it a little and get used to it I think it will be easy to understand and master. This tool is basically creating lines and curves then connecting them to complete shapes. The thing I found interesting about the video is that you are able to insert images to practice tracing over them to improve your skills then keep the outline and delete the imported image.  The second video I have chosen to watch is an introduction to the magic wand tool. This feature is used to select parts of the image or sketch that are of the same. You can select parts of the image by fill color, stroke color, stroke weight, opacity...

Dreamweaver Project

Image
  This was an HTML5 coding project created on DreamWeaver. The assignment was to create a graphic image using 10 shapes. I have titled my creation "Another Day" because it is embodying just a normal day in someones life. The piece was not what it was supposed to be and I can't say I am truly happy with the way it came out but I think it is the best I could do. I am proud that I was able to complete this assignment with something that does make sense and easy to see what it is. Starting off working on this project my idea was to create Scooby Doo and the Mystery Machine. As I started to work on it I had the car done and not even to the standards I wanted it to look like. There were many aspects of the car that I could not figure out how to do, yet creating it in its look now took an immense amount of time. Once I had the basic shape of the car done, thinking about trying to then create Scooby Doo, which would be much harder, was no longer something I was capable of. I set ...

Internet vs. World Wide Web

The internet is composed of electronic devices that can connect to the internet in order to surf the web (https://edu.gcfglobal.org/en/internetbasics/what-is-the-internet/1/). In other words the internet is the connection one makes to a network in order to have service to be able to get access to all the information provided by websites. Robert Khan and Vinton Cerf created a model that allowed data to be transmitted between multiple networks in 1970 (https://www.history.com/news/who-invented-the- internet). It was created to have founded an easier way for the transmission between computers than the early inventions which weren’t the best. Back in the 80s the internet was a means to send files and data between computers mostly seen being done by scientists (https://www.history.com/topics/inventions /invention-of-the-internet). Today people use the internet for a lot of different ways. One of the most popular uses of the internet is social media apps like snapchat or ride share apps such...